-For this slideshow I used basic functions with a little sum of detail. For example the Gaussian Blur which gives that small difference from just opacity alone as well as the scale tool that presents depth to the image.
-For the transitions, its just normal zoom in and out as well as opacity change.
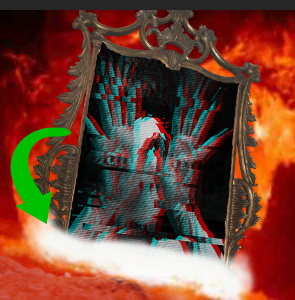
-I began with the Eye Hand image, applying the tutorial to it which gave it a glitched out look.
(Part-2)
-Then I took the image and pasted it into a blank document in Photoshop where I began to adjust and cut (with the Lasso Tool) out the image to fit the Mirror to look as if the Eye Hand image was within.
(Part-3)
-From there I Cut (again with the Lasso Tool) some of the Mirror/Eye Hand image to fit the Solar Flare image, with a added section of white color across the cut and connection area, it hid the sharp lines making it look clean and part of the image.
(Part-4)
-And at last I implemented the Bran Muffins to my image which would act as the surface of the Sun. Then adding a slight layer of red (with 50% or less opacity) above the Muffins which made them look the part.
And this was the final result of the four unedited images. Hope it looks good.
I've made this app with the selected buttons due to me constantly using them on a daily basis, so creating this shortcut of an app is super useful to me and many others I would assume.
These are some of the many shortcuts to Photoshop tools that help artists, game designers and many more complete their work at a more efficient rate.
- Alt+Mouse Wheel allows the user to zoom in and out of the project screen to get more accurate corrections or edits.
- Ctrl+T allows the user to select whatever is on the current frame and adjust or move it.
- Ctrl+S allows the user to quickly save the current project into a designated file.
- Ctrl+ N allows the user to open a new canvas, page or whatever one calls it.
- Ctrl+L allows the user to change the colors of a selected frame or text.
- And lastly, - (Left) Shift+Mouse 1 w/ Paintbrush Tool allows the user to make perfectly strait lines, without the hassle that the line tool brings.
This is the image of the Octopus with all of the forestry removed.
-Firstly I imported the image into Photoshop, then from there I proceeded to slowly remove each pixel that was of the forest behind the octopus with the eraser tool.
Then after that I cleaned it up a bit more, removed he white background, and cropped it down to a visible size, then I exported the image and pasted it into the blog and made it to medium size.
This is the Photoshop tutorial i hope to complete in the future.